Moonpig x Laura Whitmore
Make the Most of Your The Laura Bouquet
Moonpig X Laura Whitmore: Making the Most of The Laura Bouquet
I’ve got a bouqueeeet!
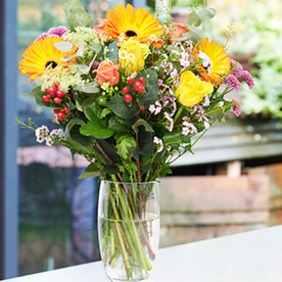
That’s right, the secret’s out! We’re so excited (like, soooo excited) to finally share our latest and most unique bouquet with you...The Laura!
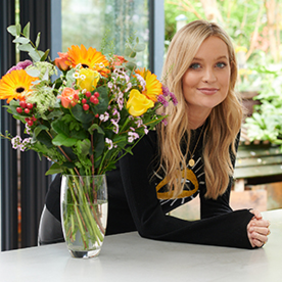
We’ve collaborated with the fabulous Love Island presenter Laura Whitmore to create a bright and beautiful bouquet that we hope you love just as much as we do. Which is a lot. We are a little obsessed.
We’ve collaborated with our favourite matchmaker to pair the perfect flowers and create this beauty of a bouquet, which we’ve incidentally named...The Laura! Funny, that. So whether you have a cute anniversary planned, your bestie’s birthday, a surprise engagement, or a just-because for a loved one (or yourself!), this bouquet has you covered. Laura said it best herself, ‘there’s nothing nicer than getting someone a bouquet of flowers. It doesn’t have to be for a birthday, it can just be for no reason, it’s just such a lovely gift’, and we couldn’t agree more!
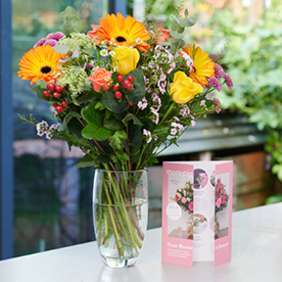
This stunning bouquet is filled with flowers inspired by Laura’s favourite colours, from vivid orange Gerbera Catwalk to pops of yellow roses and hints of pink Miss Piggy roses (probably our favourite flower name of all time, btw). It’s the perfect bouquet to brighten up the dark autumn/winter days and bring a little burst of summer joy back into our lives!
To make sure you get the most out of your bouquet, we’ve jotted down just exactly how to arrange your flowers, plus some tips and tricks of the trade.
Moonpig x Laura Whitmore

ARRANGING YOUR FLOWERS WITH LAURA AND ROXANNE
Our lovely flower expert Roxanne (aka Queen of Flowers) is here with Laura to show you how exactly to take your bouquet from door to vase, flexing those flower arranging muscles like a pro.
Step one. First of all, find this showstopper the perfect vase it can really shine in. The bolder the better. An ideal size for your vase should be wide enough to fit the stems of the bouquet and half as tall as the flowers from blossom to stem. If the vase is too short, don’t worry - you can cut your flowers down to suit!
Step two. Remove the gift wrap. All Moonpig flowers arrive in our signature nourishing wrap that’s loaded with water and nutrients to keep bouquets happy whilst travelling. Once they’ve reached their new home, you can remove the wrap.
Step three. Next up is giving the bottom of the stems a little trim. Cut approximately 2cm off the end of each stem at a 45° angle. This gives them the maximum surface area to drink up all the water and stay hydrated. Remove any leaves that would sit below the water line, as they will contaminate the water.
TOP TIP: Make sure you keep the elastic band in place when you’re giving the stems a haircut. The elastic band around your bouquet is there to help keep the hand-tied shape and our florists’ arrangement of your flowers. Keep this band in place right up to the moment you place the bouquet in your vase. Unless of course you fancy thinking outside of the box and adventuring into your own display vision!
Final Step. Now we have the final step for you...are you ready? Pick up your bouquet, remove the band, place your bouquet into the vase and once you’re happy with the position of your flowers, release! Your flowers will naturally fall into place, and baby, they’ll look stunning. 10/10, nailed the landing.
Roxanne’s Top Care Tips
Be sure to add the flower food in after the water to avoid accidently giving your flowers a little bubble bath
Get even more out of your bouquet by splitting it into several smaller arrangements into various vases
Don’t have enough vases? Upcycle! Simply use an old jam jar, a candle pot, a wine bottle, a mug, or even a pint glass - they’ll be just the perfect size for your flowers!
Aim to change your water every three days, or when the water becomes cloudy
Keep your flowers somewhere they can get natural light, but away from draughts and fruit (as fruit give of nasty gasses that flowers don’t like!).
The Laura bouquet will only be available for a limited amount of time, so be sure to get your order in quickly!
The Laura Bouquet
Shop The Bouquet

Laura Whitmore


